31 January 2011

Resident Evil 5 Minimum System Requirements


Resident Evil 5 is a survival horror third-person shooter video game developed and published by Capcom. The game Resident Evil 5 is the seventh installment in the Resident Evil survival horror series game.

If you want to play this game in your pc then you mast have to the minimum system requirement for playing this game. So guys here is the minimum system requirement for this Game Resident Evil 5.
Minimum System Requirement : 
OS: Windows XP
Processor: AMD Athlon64 X2 / Intel Pentium D series
Memory: 1 Gb
Hard Drive: 8 Gb free
Video Memory: 256 Mb
Video Card: ATI Radeon HD 2400 / NVIDIA GeForce 6800
Sound Card: DirectX Compatible
DirectX: 9.0c
Keyboard
Mouse
DVD Rom Drive
Recommended System Requirements :
OS: Windows Vista
Processor: AMD Phenom X4 / Intel Core 2 Quad series
Memory: 2 Gb
Hard Drive: 8 Gb free
Video Memory: 512 Mb
Video Card: ATI Radeon HD 4800 / NVIDIA GeForce 9800
Sound Card: DirectX Compatible
DirectX: 10
Keyboard
Mouse
DVD Rom Drive

Age of Empires Cheat Code


Age of Empires is a series of computer video games developed by Ensemble Studios and published by Microsoft Game Studios. The first title of the series was Age of Empires, released in 1997.

Cheat Code Of Age Of Empire:
To activate a cheat, push [Enter] and type in its corresponding code below.


Cheat                              Codes
1000 gold                          COINAGE
1000 food                          PEPPERONI PIZZA
1000 stone                         QUARRY
1000 wood                          WOODSTOCK
Control animals, not men           GAIA
Full map                           REVEAL MAP
Lose campaign                      RESIGN
Slay all opponents                 DIEDIEDIE
Slay select opponent*              KILL <1 - 8>
Soldier wields nuclear weapons     GIVEMEFISSIONMAN
Upgrade all units**                STEROIDS
Remove Fog of War                  NO FOG
Win campaign                       VICTORY

 **will be effected for all opponent

30 January 2011

Delicious Bookmark Widgets For Wordpress With Counter


Delicious is the most visited site of social bookmarking. Some Days ago i have write another post about Delicious Bookmark Widgets for blogger. To day i am writing about how to add Delicious bookmark widgets in wordpress. This widgets is made by mike.So let see How to do that.
Step 1: 
1. Go to the edit themes from wordpress dashboard. Then click the header.php edit the file. Then insert the code given bellow before </head> .
<script type="text/javascript" src="http://ajax.googleapis.com/ajax/libs/jquery/1.3.2/jquery.min.js"></script>
<script type="text/javascript" src="http://delicious-button.googlecode.com/files/jquery.delicious-button-1.0.min.js"></script>
Note : If you have already added jquery in your blog then don't need to add the bold line. 


Step 2:

Then go to the single.php and paste the bellow code after <?php the_content(); ?>
<div style='float:right; margin-right:10px;'>
<a class="delicious-button" href="http://delicious.com/save">
   <!-- {
   url:"<?php the_permalink() ?>"
   ,title:"<?php the_title(); ?>"
   ,button:"wide"
   } -->
   Save on Delicious
</a>
</div>
Save It now you are done. If you want this type example given up then remove the ,button:"wide"  Code and you are done . Now see your blog post how it appear. If face any problem feel free to comment.

Upload Multiple Videos to Youtube with TubeShack


Uploading video to youtube is a easy job but when you want to add more than one video  then it is not an easy job. If  you have slow internet connection then it is very hard to upload multiple video in youtube. You can do this job using TubeShack software and you dont have to open your browser. It is 100% free software.  

Download this software from  : Download TubeShack

Some features of TubeShack:
  • Multiple videos uploading - You can upload Multiple video to youtube
  • Multiple Youtube account - It have multiple youtube account support
  • Various uploading methods - Various uploading methods for uploading video such as - drag and drop,
  • Auto upload assistant
  • Upload Scheduler - You can set a time for uploading video to youtube.
  • Send your videos directly to your Twitter account
  • Share your videos with your YouTube friends or with your email contacts – Once the video has been uploaded, TubeShack will allow you to share it. 
  • And many more awesome feature.  

29 January 2011

Delicious Bookmark Widgets Blogger with Counter


Delicious is the most famous social bookmark site in the world of web and it is quite essential for every blogger . Because social bookmarking site are very good for seo and you can a lot of traffic from those site.  From a long time i am looking for this type  of beautiful bookmarking widgets for blogger. I think this plugins  will help every one who want add a beautiful delicious widgets in his or her blog with counter. I found this plugins while i am searching all over the internet and it is made by mike .

Example of delicious counter
So let see how to add this plugins in blogger blog.
Step 1:
         1. Log in to your dashboard--> Layout - -> Edit HTML
         2. Click on "Expand Widget Templates"
         3. Find this Code: </head> You can use browser search function by just pressing Ctrl+F and     Use Ctrl+C to Copy and Ctrl+V to Past.
         4.Now add this code given below before </head>
 <script type="text/javascript" src="http://ajax.googleapis.com/ajax/libs/jquery/1.3.2/jquery.min.js"></script>
<script type="text/javascript" src="http://delicious-button.googlecode.com/files/jquery.delicious-button-1.0.min.js"></script>
*** If you have already added jquery.min.js in your blog then you don't need to add thous Bold line.

Step 2 :
         5. Now find the code <p><data:post.body/></p>  it can be also like that <div class='post-body>
         6. Now add this code given bellow after <p><data:post.body/></p>
<div style='float:right; margin-right:10px;'>
<a class='delicious-button'  href='http://delicious.com/save'>
   &lt;!-- {
      url:"<data:post.url/>"
      ,title:"<data:post.title/>"
      ,button:"wide"
   } --&gt;
   Save on Delicious
</a>
</div>
         7. Now save your template and you are done. If you face any problem to adding this plugins to your blog you can comment here. I will try to do my best and another things you can customize it.

28 January 2011

Related Post Plugins for Blogger.com


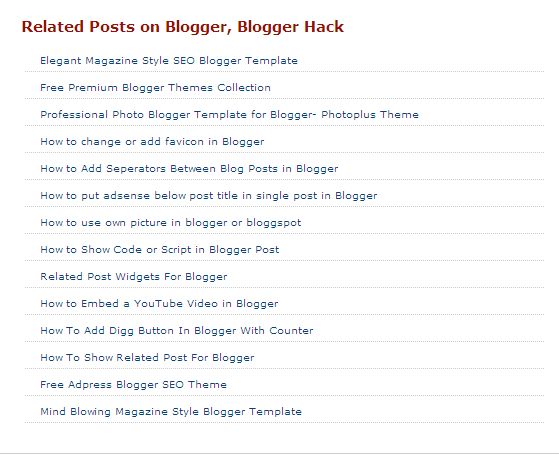
Some Days ago i have write another post about how to add related post plugins in blogger.com. But for many reason every plugins does not work with every theme and If you want to that you have to do lot of work. So i think it is much easy to test every plugins. To day i writing about another blogger.com related post plugins . Let after doing this how it looks like.
Related Post
I think it is very beautiful plugins . So Let see how to add this related plugins to  your blog .
Step 1 :
         1. Log in to your dashboard--> Layout - -> Edit HTML
         2. Click on "Expand Widget Templates"
         3. Find this Code: </head> You can use browser search function by just pressing Ctrl+F and Use Ctrl+C to Copy and Ctrl+V to Past.
         4.Now add this code given below before </head>

<style>
#related-posts {
float : left;
width : 540px;
margin-top:20px;
margin-left : 5px;
margin-bottom:20px;
font : 10px Verdana;
margin-bottom:10px;
}
#related-posts .widget {
list-style-type : none;
margin : 5px 0 5px 0;
padding : 0;
}
#related-posts .widget h2, #related-posts h2 {
color : #940f04;
font-size : 15px;
font-weight : normal;
margin : 5px 7px 0;
padding : 0 0 5px;
}
#related-posts a {
color : #054474;
font-size : 10px;
text-decoration : none;
}
#related-posts a:hover {
color : #054474;
text-decoration : none;
}
#related-posts ul {
border : medium none;
margin : 10px;
padding : 0;
}
#related-posts ul li {
display : block;
margin : 0;
padding-top : 0;
padding-right : 0;
padding-bottom : 1px;
padding-left : 16px;
margin-bottom : 5px;
line-height : 2em;
border-bottom:1px dotted #cccccc;
}
</style>
<script type='text/javascript'>
//<![CDATA[
var relatedTitles = new Array();
var relatedTitlesNum = 0;
var relatedUrls = new Array();
function related_results_labels(json) {
for (var i = 0; i < json.feed.entry.length; i++) {
var entry = json.feed.entry[i];
relatedTitles[relatedTitlesNum] = entry.title.$t;
for (var k = 0; k < entry.link.length; k++) {
if (entry.link[k].rel == 'alternate') {
relatedUrls[relatedTitlesNum] = entry.link[k].href;
relatedTitlesNum++;
break;
}
}
}
}
function removeRelatedDuplicates() {
var tmp = new Array(0);
var tmp2 = new Array(0);
for(var i = 0; i < relatedUrls.length; i++) {
if(!contains(tmp, relatedUrls[i])) {
tmp.length += 1;
tmp[tmp.length - 1] = relatedUrls[i];
tmp2.length += 1;
tmp2[tmp2.length - 1] = relatedTitles[i];
}
}
relatedTitles = tmp2;
relatedUrls = tmp;
}
function contains(a, e) {
for(var j = 0; j < a.length; j++) if (a[j]==e) return true;
return false;
}
function printRelatedLabels() {
var r = Math.floor((relatedTitles.length - 1) * Math.random());
var i = 0;
document.write('<ul>');
while (i < relatedTitles.length && i < 20) {
document.write('<li><a href="' + relatedUrls[r] + '">' + relatedTitles[r] + '</a></li>');
if (r < relatedTitles.length - 1) {
r++;
} else {
r = 0;
}
i++;
}
document.write('</ul>');
}
//]]>
</script>

Step 2 :
         5. Now find the code <p><data:post.body/></p>  it can be also like that <div class='post-body>
         6. Now add this code given bellow after <p><data:post.body/></p>
<b:if cond='data:blog.pageType == "item"'>
<div id="related-posts">
<h2>Other Recommended Posts on <b:loop values='data:post.labels' var='label'><data:label.name/><b:if cond='data:label.isLast != &quot;true&quot;'>,</b:if><b:if cond='data:blog.pageType == &quot;item&quot;'>
<script expr:src='&quot;/feeds/posts/default/-/&quot; + data:label.name + &quot;?alt=json-in-script&amp;callback=related_results_labels&amp;max-results=10&quot;' type='text/javascript'/></b:if></b:loop> </h2>
<script type='text/javascript'> removeRelatedDuplicates(); printRelatedLabels(); </script>
</div></b:if>

       7. Now save your template and you are done. If you face any problem to adding this plugins to your blog you can comment here. I will try to do my best and another things you can customize it

How to Turn Off An iPod Nano


If you are just buy  a iPod Nano and you never use it before  you may looking for very impotent thing and it is Switch Off/On button. So stop looking or searching switch off/on button because iPod nano don't have any switch off button or option. So let see how to turn off an iPod Nano.
iPod Nano 8GB
iPod Nano have only two option - awake and asleep.

How to go Sleep Mode :
Push the Play /Pause button for more then 2-3 sec to go Sleep mode.

How to go Awake Mode :
If you press any button on your nano when it is in Sleep Mode, the screen will light up quickly and your iPod will be awake and ready to rock.

If you want that your can not use your iPod for a period than you have must sure that iPod have full charge. Than go to Sleep Mode and Lock your iPod. So your iPod will not accidentally awake.

Twitter Delicious Facebook Digg Stumbleupon Favorites More