Showing posts with label Linux OS. Show all posts

23 March 2011

14 Themes for Ubuntu 10.10


By Default , Many themes available in Ubuntu . If you are not satisfied with that or you need more ,Don worry Bigsi themes is there for you .
Bigsi themes was available for Ubuntu 10.04 ( Ubuntu LTS Version ) .But now it is updated now . So check out updated one.

How to Install:
Installation is very easy .Just open the terminal and run the commands
sudo add-apt-repository ppa:bisigi
sudo aptitude update
sudo apt-get install bisigi-themes

How to Uninstall :
Open the terminal and run the following command
sudo aptitude remove bisigi-themes
There is also another way to install. You can also install themes separately .
1) Showtime for Gnome
Code :sudo apt-get install showtime-theme
1


2) Balanzan
Code: sudo apt-get install balanzan-theme
balanzan_pres


3) Infinity
Code:sudo apt-get install infinity-theme
infinity-pres

4) Wild shine
Code:sudo apt-get install wild-shine-theme
wild-pres

5) Exotic
Code:sudo apt-get install exotic-theme
exotic


6) Tropical 
Code : sudo apt-get install tropical-theme
tropical-prsentation


7) Bamboo Zen
Code:sudo apt-get install bamboo-zen-theme
bamboo-prs


8)Ubuntu sunrise
Code: sudo apt-get install ubuntu-sunrise-theme
ubuntu_presentation

9) Aqua Dreams
Code: sudo apt-get install aquadreams-theme
expose

10) Step into Freedom
Code:sudo apt-get install step-into-freedom-theme


11) Orange
Code:sudo apt-get install orange-theme


12)Ellanna
Code:sudo apt-get install ellanna-theme


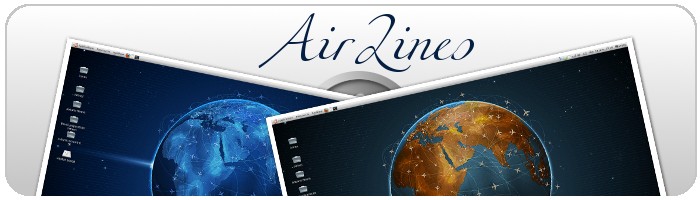
13)AirLines
Code:sudo apt-get install airlines-theme


14) Eco
Code:sudo apt-get install eco-theme


Source : Linux Tree

12 February 2011

Change Mac Address in Linux


You can change your Mac address very easily in your Linux PC. You can change your mac address just 2 step. In first step you can be able identify your mac address and second address you can able change your mac address So let see how can we see the mac address and how can we change the mac address.

Step 1 : Identify the Mac address of Your LAN
1. Open Terminal window from Accessories .
2. Enter the command given bellow :
ifconfig 
3. Now you are already found your output. In out put you can see something like that eth0, if you use one card then you can see eth0 or if you use more then one card the you can see some thing like that eth1, eth2, eth3 . For example you can see the bellow picture.
In the terminal output look for something like that : HWaddr 00:01:02:03:04:05 . it is your mac address save it before close the window.

Step 2: Changing MAC address :
1. Go to the terminal - Applications > Accessories > Terminal .
2.Input the bellow command in the window : 
ifconfig eth0 down
ifconfig eth0 hw ether 00:01:02:03:04:05
ifconfig eth0 up
 
In the second line input your mac address .
3. In Terminal input the bellow command :
sudo gedit /etc/network/interfaces
A new text editor gadget will open. You see the bellow code in the text editor
auto eth0
iface eth0 inet static

address 111.222.333.444
gateway 555.666.777.888
netmask 255.255.255.0
if your connection is not Static then you will see the bellow code :
auto eth0
iface eth0 inet dhcp

address 111.222.333.444
gateway 555.666.777.888
netmask 255.255.255.0
Now enter your mac address in the second line. After entering the mac address in text editor pad your code will be like that :
auto eth0
iface eth0 inet static hwaddress ether 01:02:03:04:05:06

address 111.222.333.444
gateway 555.666.777.888
netmask 255.255.255.0
or
auto eth0
iface eth0 inet dhcp hwaddress ether 00:01:02:03:04:05
 Now 00:01:02:03:04:05 will be replaced by your mac address. After changing this 00:01:02:03:04:05 to your mac address save and close the text pad.
4. Now in Terminal enter the command given bellow:
sudo /etc/init.d/networking restart
 Now your done. If any cause you want to go back to your old mac address then remove the few extra line you already added in text editor gadit.

11 February 2011

Installing New Font In Ubuntu/ Linux Mint


Installing new font family in Ubantu or Linux Mint not an easy job if you dont know how to install it.For installing font you maybe looking for something like Font folder as windows but you will not find it because windows and linnux are very deference. What ever i think some how linux is better than windows because it is free and Microsoft Windows is not free. You have to pay for it. If you know every thing about Ubuntu or Linux Mint then you always think that Linux is better then Windows. So let see how to add or install new font in Ubuntu or Linux Mint.

How to Install Font in Ubuntu/ Linux Mint :
1. Select and Copy the font you want to install.
2. Close all the window and Press ALT and F2 from the keyboard after press a new window will open. In the window write the bellow code and press Enter  :
gksudo nautilus
3. If it want password then give your password. Then a new window will open and the window color will deference from the othee window.
4. In the new window Browse to go the Font Folder. like  :
Filesystem>>usr>>share>>fonts 
5. Paste the font in this folder and close the window.
6. Now open the terminal and type the code given bellow.
sudo fc-cache -f fonts
7. After ending this work ristart the PC and your done. Now you are able to use your new font in Ubuntu or Linux Mint  Pc.

Twitter Delicious Facebook Digg Stumbleupon Favorites More