Showing posts with label Blogger Hack. Show all posts

19 March 2011

Show Latest Post Using FeedBurner [How To, Blogger]


You can show your latest post in your blogger blog or wordpress blog very easily using feedburner.  i give a screen shot of this plugins up. If you want this widgets you must have an account with feedburner. If you dont have feedburner account you should need to open a account from : feedburner.google.com . Let see how to show latest post in blogger or wordpress blog by using feedburner.
Step 1:
1. At first go to Publicize option from feedburner dashboard just like the picture bellow.
2. Then from the left side bar click BuzzBoost
Step 2:
1. Now you have to configure your Latest Post Widgets. How many post you want show select it just like the bellow picture.
2. You can set the way you want to open your latest post. You can find two option select what you want.
3. Set your Feed title

5. After doing every this like this picture Click Activate button. And then you will find the code which will show the latest post.
6. Copy this code and add it to your blogger or wordpress blog. enjoy this !!

17 March 2011

Make Blogger Post Title Unclickable In Single Post Page


If you want to make your blog post unclickable then this perfect for you. By replacing this bellow code you can make your blog post nonclickable. If you will make your blog post nonclickable and then add a ads bellow it i think it will be more better for making profit from blog. So let see how to do that -

For Blogger Blog:
01. Go to Layout -> Edit HTML and click on Expand Widget Templates
02. Now look for something similar to this code in your template:

<b:if cond='data:post.title'>
<h2 class='post-title entry-title'>
<b:if cond='data:post.link'>
<a expr:href='data:post.link'><data:post.title/></a>
<b:else/>
<b:if cond='data:post.url'>
<a expr:href='data:post.url'><data:post.title/></a>
<b:else/>
<data:post.title/>
</b:if>
</b:if>
</h2>
</b:if>


03. And Replace It with:

<b:if cond='data:blog.pageType != "item"'>
<h2 class='post-title entry-title'>
<a expr:href='data:post.url'><data:post.title/></a>
</h2>
<b:else/>
<h2 class='post-title entry-title'>
<data:post.title/>
</h2>
</b:if>
05. Now Save it and See how it work.

For Wordpress User :
01. In your Wordpress Admin Dashboard, in left hand side, click on Appearance -> Editor02. Now Click on Single.php from your right hand sidebar Theme Files.
03. Search for:
<h2><a href="<?php the_permalink(); ?>"><?php the_title(); ?></a></h2>

And Replace It with:
<h2><?php the_title(); ?></h2>
Save it. Now when you will post a new post. It will be unclickable.

06 March 2011

Create Facebook Fan Page For Blogger Blog


Facebook is now the mostly used social network. I think it is very good idea to establish or promote your business and website in facebook. Most of the major brand and website and organization have facebook fan page.  Recently facebook change there layout. Now i am going to show you how to create a facebook fan page for your blogger blog. Hope you will enjoy this. This is the link of this blog Facebook Fan Page : Tech Wev

1. At first log in your facebook account then click the link to start creating facebook fan page : Facebook Fan Page Create . And then select Brand or product like the bellow picture.

2. This is the step 2 for creating facebook fan page for blogger. From the Brand or product box set website and bellow text box enter your facebook fan page name like the picture. Then click Get started

3. Now your facebook fan page created. You have to customize it now. Upload a picture for you fan page.

4.Your fan page is properly set up. Click Edit button from the right side just like the bellow picture. Fill up all your information about your blog and save it.
5. You can post your blogger blog post automatically to your Facebook fan page. For doing this job i am using RSS Graffiti. Click this link : RSS Graffiti to install RSS Graffiti your fan page.

6. After authorize the RSS Graffiti you can see your facebook fan page in right side just like the bellow picture.

7.Select your fan page to authorize Rss Graffiti for the fan page. Authorize Rss Graffiti for your fan page just like the picture given bellow.

8.Now also authorize this like the bellow picture.

9.Now your almost end of the setting up  the blogger fan page. Click Add Feed and Enter your rss feed link here.

10.After adding feed go to the Filter Tab and Click Change and then select the oldest post (to publish all of your blog post in facebook fan page)  from the drop down menu just like the bellow picture and click Save .
It will take some time to post your blog post in facebook fan page. But from now every time when you published a new blog post in your blog it will also be published in your Facebook Fan Page.

You made your Facebook Fan page. You can make your facebook fan page more beautiful like that : Masabal FB Fan Page In my next post i will write about how you can give your facebook fan page more professional look.

05 March 2011

Stylish Subscription Box Below Posts For Blogger


You can increase your subscriber by placing a email subscription box below every post in blogger and it will be best visible in your blogger blog post. By placing a beautiful subscriber bellow every post you can increase your blogger blog traffic. Your visitors and reader can easily find subscription option. Once they come to the end of the post if they feel that your post is important then they will subscribe to your blog.


Now I'm going to show you now how to add a Stylish Subscription box bellow blogger post. If you would like see the demo please see the picture given up. 


Login to your Blogger account and go to Design > Edit HTML > Check Expand widget template and find the following code:
data:post.body 
Now add the following code after it
<b:if cond='data:blog.pageType == &quot;item&quot;'> <form action='http://feedburner.google.com/fb/a/mailverify' method='post' onsubmit='window.open(&apos;http://feedburner.google.com/fb/a/mailverify?uri=techwev&apos;, &apos;popupwindow&apos;, &apos;scrollbars=yes,width=550,height=520&apos;);return true' style='border:1px solid #DDD;padding:3px;text-align:center;background:#F1F1F1;' target='popupwindow'><span style='margin:0 auto; padding-left:24px; position:relative;background: url(https://blogger.googleusercontent.com/img/b/R29vZ2xl/AVvXsEj1DNF_HrmMFleH_8gtnzjF5Il4EyrYcGSRpEEH4we-tmvgD7GuzexbN95nGz5Oj16XSIj_NmpHSl_uaMRRf_N0gUeKVorcCr9lt-gqREHUwaGo3Iw2XxMLlaf7EAsGQEruz9ZeH212ArI/s1600/myrss.gif) right center no-repeat;'/>Get Free Updates: <input name='email' onblur='if (this.value == &quot;&quot;) {this.value = &quot;Enter your email&quot;;}' onfocus='if (this.value == &quot;Enter your email&quot;) {this.value = &quot;&quot;}' style='width:176px;height:18px; background: #ffffa0 url(https://blogger.googleusercontent.com/img/b/R29vZ2xl/AVvXsEhVAi3XmdVj1mfojmgDz_CKSL16CyNU6VfENal9hU4ujFsqopPQ285nj1BcONJbsdoIIccIBWyLQTn5y8o7yT4S2azfws534H934SJJPG8jl5fRCz4UVwj6GebboMSDWmfoOZunn3xoQevv/s1600/new-email.png) left no-repeat;padding: 1px 0px 1px 24px;border: 1px solid #8cafe3;' type='text' value='Enter your email'/><input name='uri' type='hidden' value='techwev'/><input name='loc' type='hidden' value='en_US'/><input type='submit' value='Subscribe'/>
<center><i>Note : You will find a confirmation link in your inbox or junk folder</i></center>
</form>
</b:if>
Note : Replace the Red color techwev with your feedburner id  and save it and your done! Enjoy this tutorial and if any problem please let me know by comment in this post.

18 February 2011

Nice Author Box Widgets For Blogger


I have seen many time that many Wordpress popular blog have a beautiful section to know every that who is the author of this post or blog. I have also seen that some blog have a particular page or text box in footer to show something about the blogger. I think a Author box in post footer make your blog more professional. You may be thinking of that why i dont adding a author box in post footer actually i am thinking about it maybe some days later i will also add a author box in this blog. Any way I strongly believed that  a nice author box under the post footer make your blog more professional and also you add a twitter or facebook link that would be helpfully for increasing follower and fan. So let see how to add a Nice and Beautiful Author Box Widget Under your blog post footer like many popular wordpress blog.   

This is a screen shot of this widget :
About the author widget for blogger
How to Add About The Author Widget In Blogger? See bellow


1.Open your Blogger Dashboard and then go Design and then Edit HTML
2. Find the bellow code. For faster search use Ctrl + F

]]></b:skin>
3. Add the bellow code just before it .
.authbio{
color: #666;
font-weight: normal;
font-size:0.9em;
background: #fff;
border: 1px solid #ccc;
width: 540px;
padding: 15px;
margin-bottom:25px;
}
.authbio a{
text-decoration:underline;
}
img.alignleft {
float:left;
background-color: #c4e3e0;
border:1px solid #c4e3e0;
padding: 5px;
margin-left:2px;
margin-top:0px;
margin-bottom:25px;
margin-right:12px;
}
4. Now search for the following text
                               <data:post.body/>

5. Now add the following code after it 
<div class="authbio">
<div style="float: left;">
<img alt="" src="http://i.imgur.com/VHDtW.jpg" />
</div>
<h1>
About The Author</h1>
Add Your Personal Information here. You can also add some link of you like facebook, twitter or linkdin profile anything you want </div>

** Replace the red color link with your image link.
Save it and See how it look like. I hope you will understand how to add this. If any problem let me know by comment i will try to assist you .

15 February 2011

Another Social Subscribe Section For Blogger


Some days ago i have write another post about Attractive Subscribe Section For Blogger . You can see this for adding social subscription in your blog.  To day i am writing about another Social Subscribe Section for blogger. I think this simple tips make your blogger blog more beautiful. Social subscription section is very important for blogger. Because now a days social network tons of traffic. So let see how it look like and how to add it.   
example of widget


You can add this to your blog in just 2 step. So let see how to add this widgets in blogger blog.
Step 1:
1. Click Design and then Edit HTML from blogger Dashboard
2. Click in the left side box to Expand Widget Templates
3. Find this -    ]]></b:skin> and past the bellow code just before
#subscribe { background:#f3f3f3; width:308px; padding:8px 5px; border:1px solid #e6e6e6; border-bottom:1px solid #e6e6e6; font-size:8px; }
.subscribe_icons { width:286px; margin:0px auto; }
.subscribe_icons li { display:inline; float:left; margin:0px 2px 5px 2px; width:52px; text-align:center; font-size:11px; }
.subscribe_icons a { display:block; padding:40px 0px 2px; -webkit-transition:all .2s ease-out; -moz-transition:all .2s ease-out; color:#444 !important; }
.subscribe_icons a:hover { color:#26b !important; text-decoration:none; -moz-box-shadow:0px 2px 4px hsla(0,0%,0%,.35); -webkit-box-shadow:0px 2px 4px hsla(0,0%,0%,.35); }
.subscribe_icons .subscribe_buzz a { background:url(https://blogger.googleusercontent.com/img/b/R29vZ2xl/AVvXsEiRg5Wi5qg5be9LOimG4LwZ62e6kNDIzbbBHgNeuOfH-oZTgv36EGaTelQGZdfhAIwpXAC6rZ0JftXbKR2-NEWciHugXZJRESw8GokktwjDdTez-bG9qoadrnFsZK7u4HvYErBy_AbqaWs/s1600/buzz.png) center top no-repeat; }
.subscribe_icons .subscribe_twitter a { background:url(https://blogger.googleusercontent.com/img/b/R29vZ2xl/AVvXsEjVC7uCmEv0ZVxyE9_gWkjgfoWZ4MIhBRCIsg9LbEcE0q-cxIrGelwh5L8YZom9_ae6mVqoddAwBIV8q6rVv9o-yKOdsrywgb2A04Z9V76pfbBdvcvTF3qXgKFXppFnpvLbXz8HvDZaJ00/s1600/twitter1.png) center top no-repeat; }
.subscribe_icons .subscribe_facebook a { background:url(https://blogger.googleusercontent.com/img/b/R29vZ2xl/AVvXsEgkulCqr7HXur6WyA62EjZ3UjnfbaVdJV5GTP4W677tywSyIbwSRQyx_5Aa6lsZZmr8_dEEJ1gfJn5PDHw8v_bd3mmKUwLgHEi7q0D-dWghqXrjZmIvgSv-QeUnsHWe5d-5GTQ-ILs4Ohs/s1600/facebook1.png) center top no-repeat; }
.subscribe_icons .subscribe_rss a { background:url(https://blogger.googleusercontent.com/img/b/R29vZ2xl/AVvXsEiKYhpM5XBprj_b3foKRURdkrjyjn7jaiY1KBwD5mAtJMsHu3apm5pZyBHVnMNUBnP0MfNgs5nCCvilyVCaXjUVIxC5qHzWChHiK4ufdBxeTMIg401AFRGU-C8eKhn6pP1_ZXV2BIrH7sk/s1600/rss1.png) center top no-repeat; }
.subscribe_icons .subscribe_email a { background:url(https://blogger.googleusercontent.com/img/b/R29vZ2xl/AVvXsEi7wua7mtb2Cb_40u0Sqyvv_6ey76jyGjFYaFUR-VXb0eNYohjOrX70f3QWw-_jG0nHx2YWzzG_c1bz7RRVkHr6g3GzZMwmF5GomywXsvwscmRzBOo1GWJVWm0ykqPtxamvn8qJpgUAlgU/s1600/email.png) center top no-repeat; }
4. Save it

Step 2:
 1. Now go to the Page Element which you will find in left side of Edit HTML
2. From the right side click Add a Gadget to add a HTML/Javascript box .
3. In the HTML/Javascript box paste the code given bellow :
<div id="subscribe">

<ul class="subscribe_icons">
<li class="subscribe_buzz"><a href="http://google.com/profiles/techwev" rel="nofollow" target="_blank">Buzz</a></li>
<li class="subscribe_twitter"><a href="http://twitter.com/techwev" rel="nofollow" target="_blank">Twitter</a></li>
<li class="subscribe_facebook"><a href="http://www.facebook.com/techwev" rel="nofollow" target="_blank">Facebook</a></li>
<li class="subscribe_rss"><a href="http://feeds.feedburner.com/techwev" rel="nofollow" target="_blank">RSS</a></li>
<li class="subscribe_email"><a href="http://feedburner.google.com/fb/a/mailverify?uri=techwev&amp;loc=en_US" rel="nofollow" target="_blank">Email</a></li>
</ul>

<div class="clear">

</div>
</div>
4. Save it and see how it look like. If anything need about this post pls comment. I will try to help you.

07 February 2011

Attractive Subscribe Section For Blogger


In this article i am going to explain how to add a attractive subscribe section in your blogger blog. This subscribe section is included Feedburner feed and Email subscriptions, Twitter and Digg follow option. So let see how to add this social subscribe section in blogger blog.
Step 1 :

         1. Log in to your dashboard--> Layout - -> Edit HTML
         2. Click on "Expand Widget Templates"
         3. Find this Code: You can use browser search function by just pressing Ctrl+F and Use Ctrl+C to Copy and Ctrl+V to Past.
         4.Now add this code given bellow before  ]]></b:skin> and Save it after done.

.subbox{width:280px;border:0 solid #141414;overflow:hidden}
.rssbox{background:#f7f6f6;border:1px solid #ccd1d7;padding:5px 10px;margin:10px 0 0 0;-moz-border-radius:10px;-khtml-border-radius:10px;-webkit-border-radius:10px;border-radius:10px;width:105px}
.rssbox:hover{border:1px solid #92aed1}
.rssbox a{color:#7c8a9b;text-transform:uppercase;text-decoration:none;font:bold 12px Arial,Helvetica,Sans-serif}
.rssbox a:hover{color:#7c8a9b;text-decoration:underline}
.emailsbox{background:#f7f6f6;border:1px solid #ccd1d7;padding:5px 10px;margin:10px 0 0 0;-moz-border-radius:10px;-khtml-border-radius:10px;-webkit-border-radius:10px;border-radius:10px;width:105px}
.emailsbox:hover{border:1px solid #92aed1}
.emailsbox a{color:#7c8a9b;text-transform:uppercase;text-decoration:none;font:bold 12px Arial,Helvetica,Sans-serif}
.emailsbox a:hover{color:#7c8a9b;text-decoration:underline}
.twitterbox{background:#f7f6f6;border:1px solid #ccd1d7;padding:5px 10px;margin:10px 0 0 0;-moz-border-radius:10px;-khtml-border-radius:10px;-webkit-border-radius:10px;border-radius:10px;width:105px}
.twitterbox:hover{border:1px solid #92aed1}
.twitterbox a{color:#7c8a9b;text-transform:uppercase;text-decoration:none;font:bold 12px Arial,Helvetica,Sans-serif}
.twitterbox a:hover{color:#7c8a9b;text-decoration:underline}
.diggbox{background:#f7f6f6;border:1px solid #ccd1d7;padding:5px 10px;margin:10px 0 0 0;-moz-border-radius:10px;-khtml-border-radius:10px;-webkit-border-radius:10px;border-radius:10px;width:105px}
.diggbox:hover{border:1px solid #92aed1}
.diggbox a{color:#7c8a9b;text-transform:uppercase;text-decoration:none;font:bold 12px Arial,Helvetica,Sans-serif}
.diggbox a:hover{color:#7c8a9b;text-decoration:underline}


Step 2: Add a HTML/Javascript in your blogger blog right side bar from the Page Element Under Design and past the bellow code in this box and save it.
<table><tr>
<td><div class="rssbox">
<a href="http://feeds.feedburner.com/techwev" target="_blank" rel="nofollow"><img src="https://blogger.googleusercontent.com/img/b/R29vZ2xl/AVvXsEjkN-giH58_CAMEAe2YXsdtrRAdk3QvCs6xOvGuu1v4mPDgV2rEUurBV5N_EtdqJA5yfmPFCMXQySya_N9lMU9IK0UOIUUyiy-SFql-bPdspTkBvrasmDvVGeh7c1RkoX350KaLULnIA_pP/"  alt="RSS Feed" title="RSS Feed" style="vertical-align:middle; margin-right: 5px;border:none;"  /></a><a href="http://feeds.feedburner.com/techwev" target="_blank" rel="nofollow">RSS Feed</a>
</div></td>
<td><div class="emailsbox">
<a href="http://feedburner.google.com/fb/a/mailverify?uri=
techwev" target="_blank" rel="nofollow"><img src="https://blogger.googleusercontent.com/img/b/R29vZ2xl/AVvXsEiRBkXTRjdwHK696HRAp3N9UD2hlklF997im6Mw90GCOo2pd5PeCFjmOlx3C15W55IcpgWnaqk_m-MkW9J0FF3oelHguFI7OvuFi6kesvcPQs7W-2xvRY7T9K6yXMpvbDr1y88XdoQ5ebxv/"  alt="EMail Feed" title="EMail Feed" style="vertical-align:middle; margin-right: 5px;border:none;"  /></a><a href="http://feedburner.google.com/fb/a/mailverify?uri=techwev" target="_blank" rel="nofollow">EMail Feed</a>
</div></td>
</tr><tr>
<td><div class="twitterbox">
<a href="http://twitter.com/
techwev" target="_blank" rel="nofollow"><img src="https://blogger.googleusercontent.com/img/b/R29vZ2xl/AVvXsEggblb7QDhPTXmxRCOTZgpo1yRyw71jzKKQDkbym83VMwVGIyfWs70Wfc-vUbHqjeNRpnpz0Y3i8LfAo2F1WUdp-1yA7vOUrWnHTCvcIMGYN-ho6kP-qToUX2v6nf7MQAxOZDQ85GNPSGjU/"  alt="Twitter" title="Twitter" style="vertical-align:middle; margin-right: 5px;border:none;"  /></a><a href="http://twitter.com/techwev" target="_blank" rel="nofollow">Follow Twitter</a>
</div></td>
<td><div class="diggbox">
<a href="http://www.digg.com/techwebd" target="_blank" rel="nofollow"><img src="http://img209.imageshack.us/img209/2774/digg.jpg"  alt="Digg" title="Follow On Digg" style="vertical-align:middle; margin-right: 5px;border:none;"  /></a><a href="http://www.Digg.com/techwebd" target="_blank" rel="nofollow">Follow On Digg</a>
</div></td>
</tr></table>
 
*** Replace the red text with your id and if any problem just let me know that via comment .

29 January 2011

Delicious Bookmark Widgets Blogger with Counter


Delicious is the most famous social bookmark site in the world of web and it is quite essential for every blogger . Because social bookmarking site are very good for seo and you can a lot of traffic from those site.  From a long time i am looking for this type  of beautiful bookmarking widgets for blogger. I think this plugins  will help every one who want add a beautiful delicious widgets in his or her blog with counter. I found this plugins while i am searching all over the internet and it is made by mike .

Example of delicious counter
So let see how to add this plugins in blogger blog.
Step 1:
         1. Log in to your dashboard--> Layout - -> Edit HTML
         2. Click on "Expand Widget Templates"
         3. Find this Code: </head> You can use browser search function by just pressing Ctrl+F and     Use Ctrl+C to Copy and Ctrl+V to Past.
         4.Now add this code given below before </head>
 <script type="text/javascript" src="http://ajax.googleapis.com/ajax/libs/jquery/1.3.2/jquery.min.js"></script>
<script type="text/javascript" src="http://delicious-button.googlecode.com/files/jquery.delicious-button-1.0.min.js"></script>
*** If you have already added jquery.min.js in your blog then you don't need to add thous Bold line.

Step 2 :
         5. Now find the code <p><data:post.body/></p>  it can be also like that <div class='post-body>
         6. Now add this code given bellow after <p><data:post.body/></p>
<div style='float:right; margin-right:10px;'>
<a class='delicious-button'  href='http://delicious.com/save'>
   &lt;!-- {
      url:"<data:post.url/>"
      ,title:"<data:post.title/>"
      ,button:"wide"
   } --&gt;
   Save on Delicious
</a>
</div>
         7. Now save your template and you are done. If you face any problem to adding this plugins to your blog you can comment here. I will try to do my best and another things you can customize it.

28 January 2011

Related Post Plugins for Blogger.com


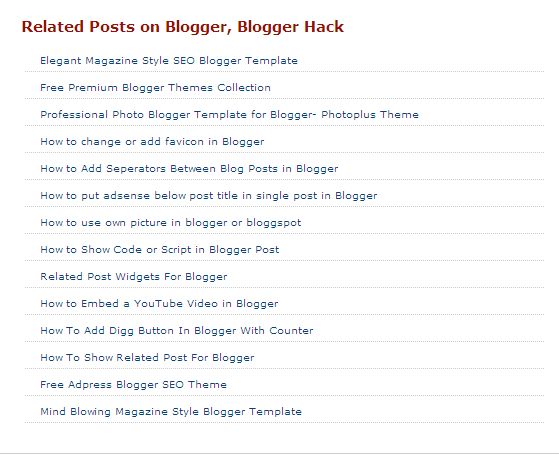
Some Days ago i have write another post about how to add related post plugins in blogger.com. But for many reason every plugins does not work with every theme and If you want to that you have to do lot of work. So i think it is much easy to test every plugins. To day i writing about another blogger.com related post plugins . Let after doing this how it looks like.
Related Post
I think it is very beautiful plugins . So Let see how to add this related plugins to  your blog .
Step 1 :
         1. Log in to your dashboard--> Layout - -> Edit HTML
         2. Click on "Expand Widget Templates"
         3. Find this Code: </head> You can use browser search function by just pressing Ctrl+F and Use Ctrl+C to Copy and Ctrl+V to Past.
         4.Now add this code given below before </head>

<style>
#related-posts {
float : left;
width : 540px;
margin-top:20px;
margin-left : 5px;
margin-bottom:20px;
font : 10px Verdana;
margin-bottom:10px;
}
#related-posts .widget {
list-style-type : none;
margin : 5px 0 5px 0;
padding : 0;
}
#related-posts .widget h2, #related-posts h2 {
color : #940f04;
font-size : 15px;
font-weight : normal;
margin : 5px 7px 0;
padding : 0 0 5px;
}
#related-posts a {
color : #054474;
font-size : 10px;
text-decoration : none;
}
#related-posts a:hover {
color : #054474;
text-decoration : none;
}
#related-posts ul {
border : medium none;
margin : 10px;
padding : 0;
}
#related-posts ul li {
display : block;
margin : 0;
padding-top : 0;
padding-right : 0;
padding-bottom : 1px;
padding-left : 16px;
margin-bottom : 5px;
line-height : 2em;
border-bottom:1px dotted #cccccc;
}
</style>
<script type='text/javascript'>
//<![CDATA[
var relatedTitles = new Array();
var relatedTitlesNum = 0;
var relatedUrls = new Array();
function related_results_labels(json) {
for (var i = 0; i < json.feed.entry.length; i++) {
var entry = json.feed.entry[i];
relatedTitles[relatedTitlesNum] = entry.title.$t;
for (var k = 0; k < entry.link.length; k++) {
if (entry.link[k].rel == 'alternate') {
relatedUrls[relatedTitlesNum] = entry.link[k].href;
relatedTitlesNum++;
break;
}
}
}
}
function removeRelatedDuplicates() {
var tmp = new Array(0);
var tmp2 = new Array(0);
for(var i = 0; i < relatedUrls.length; i++) {
if(!contains(tmp, relatedUrls[i])) {
tmp.length += 1;
tmp[tmp.length - 1] = relatedUrls[i];
tmp2.length += 1;
tmp2[tmp2.length - 1] = relatedTitles[i];
}
}
relatedTitles = tmp2;
relatedUrls = tmp;
}
function contains(a, e) {
for(var j = 0; j < a.length; j++) if (a[j]==e) return true;
return false;
}
function printRelatedLabels() {
var r = Math.floor((relatedTitles.length - 1) * Math.random());
var i = 0;
document.write('<ul>');
while (i < relatedTitles.length && i < 20) {
document.write('<li><a href="' + relatedUrls[r] + '">' + relatedTitles[r] + '</a></li>');
if (r < relatedTitles.length - 1) {
r++;
} else {
r = 0;
}
i++;
}
document.write('</ul>');
}
//]]>
</script>

Step 2 :
         5. Now find the code <p><data:post.body/></p>  it can be also like that <div class='post-body>
         6. Now add this code given bellow after <p><data:post.body/></p>
<b:if cond='data:blog.pageType == "item"'>
<div id="related-posts">
<h2>Other Recommended Posts on <b:loop values='data:post.labels' var='label'><data:label.name/><b:if cond='data:label.isLast != &quot;true&quot;'>,</b:if><b:if cond='data:blog.pageType == &quot;item&quot;'>
<script expr:src='&quot;/feeds/posts/default/-/&quot; + data:label.name + &quot;?alt=json-in-script&amp;callback=related_results_labels&amp;max-results=10&quot;' type='text/javascript'/></b:if></b:loop> </h2>
<script type='text/javascript'> removeRelatedDuplicates(); printRelatedLabels(); </script>
</div></b:if>

       7. Now save your template and you are done. If you face any problem to adding this plugins to your blog you can comment here. I will try to do my best and another things you can customize it

23 January 2011

How to Show Code or Script in Blogger Post


This tutorial only show you how to add code or javascript code to blogger post without being executed. You can change the way you show it by using blockquote or your own style.

Step 1. Go to your blog >> Posting >> New Post and write everything you want to show to your reader except your Code or Script. Please make sure you use Edit Html to post your article.

Step 2. Copy the script you want to show to your reader. Let me give you the example :
<div class='post-body entry-content'>
<data:post.body/>
<div style='clear: both;'/> <!-- clear for photos floats -->
</div>
Copy that code and convert it using Parse HTML generator tool. you can find it here
           http://www.techweb.cz.cc/p/prase-html.html

Step 3. Parse the code and copy the result to your edit html editor post. You can use blockquote to make it looks different.

Step 4. Publish your post and done.

Related Post Widgets For Blogger


Related Post widgets option for your blog to stay blog readers more time in your blog. My today post is about blogger related post. Some days ago in this blog i have write another post about How to Show related post in blogger. To day i am writing another post about how to show related post in blogger or how to add related post widgets in blogger. I think this process is much easier then my previous post. But This Widgets does not work for any one please try the previous Post about how to show related post in blogger. Now Let see how to add related post widgets in blogger easily.

Instruction For Adding Related Post In Blogger
  1. Go to Layout > Edit HTML in your Blogger Dashboard.
  2. Back up your existing Template before making any changes!
  3. Make sure to check the "Expand Widget Templates" box.
  4. Search for the </head> tag.

06 November 2010

How to Embed a YouTube Video in Blogger


Find the video you want to embed. At the bottom right-hand corner of the video, you will see a small arrow button. Click it to view the small “share” button.
Image and video hosting by TinyPic
Search  Embed like this picture and click it . Now you will find the embed code for your blogger .Just copy it .
Now you have to your blogger dashboard for posting a new video post. In writing window you can see 2 option one is Compose and other one is Edit HTML .

Click Edit HTML  and past the embed code as u want to show your blogger blog .

And published the post .

27 October 2010

How To Add Digg Button In Blogger With Counter


To setup this widget in your blog First of all go to your blog Edit Html Page , Expand Widget Templates and Follow the simple steps that follows below.

First of all search for the following line of Code in your Template.

<p><data:post.body/></p>

Now if you like to show digg button at Top Left of your blog Post then Replace the above code with the following lines of Code.

25 October 2010

How To Show Related Post For Blogger


Warning : Before you start any Blogger Hack Please Backup your Blogger Template

First of all Goto Blogger Edit Html Page,Expand Widget Templates and Paste the Following Code just above </head> in your blogger Template.

21 August 2010

How to change or add favicon in Blogger


Changing or adding blogger favicon is a easy work. This tutorial for those people who now in blogger or new in html programing and not change there blogger icon yet. Blogger have a default favicon  . You should need to change it for fully customization of your blog. Now step by step i m showing how could u change your blogger favicon . Just do it by following this tutorial if you got any problem you can tell me by commenting this post .

At first you need make your icon . 40*40 is best size for icon keep it mind that the icon size is very important for faster loading of your web site . So keep the size in 2-10 kb and the last things host it any where and keep a copy of your favicon url. Then start the following instruction : 

19 August 2010

How to Add Seperators Between Blog Posts in Blogger


With A Separators between blog post in blogger  your blog looks like gorgeous. So why not add ur post separators in your blogger blog and make your blog look good. 
 
Log into your blogger account, move to , Dashboard >> Layout >> Edit html, and Search

05 August 2010

How to put adsense below post title in single post in Blogger


It is very simple way to showing ad sense code below post title in single page post.  Your blog earnings depend mainly on your blogs traffic and on your ad placement. One important place to place the ads is below the Post title. It will give more importance to the ads and there is more possibility to get clicks. This is in accordance with the Google Ad sense terms and service. I am also using same hack in my blog. If you got any problem just comment here i will do the best thing for you .

Process of adding adsense code below single page post title :
1) Sin in to blogger.com

04 August 2010

How to use own picture in blogger or bloggspot


Responding to many requests, Blogger now gives users the ability to upload their own background image for their blog. It's a new Template Designer feature which is currently available in Blogger in Draft. Here's how to use your own photo for your blog's background.

Template Designer
  • Login to Blogger in Draft.
  • Go to Design > Template Designer > Background.
  • Click on Background Image, and you’ll notice a new “Upload image” option, which will allow you to select and upload your image.
  • For images that fill the entire background, Blogger recommends using a resolution of 1800 pixels wide and 1600 pixels high, and file size less than 200KB to minimize blog pages loading time.
  • JPEG, GIF, and PNG format for images are supported.
Using a personalized blog background in normal mode is possible. However, you will need a little CSS coding know-how for customization. This new feature in Blogger Template Designer makes it easier for ordinary users to do that.

Additional details about this new feature are available on this page some days later.

Twitter Delicious Facebook Digg Stumbleupon Favorites More